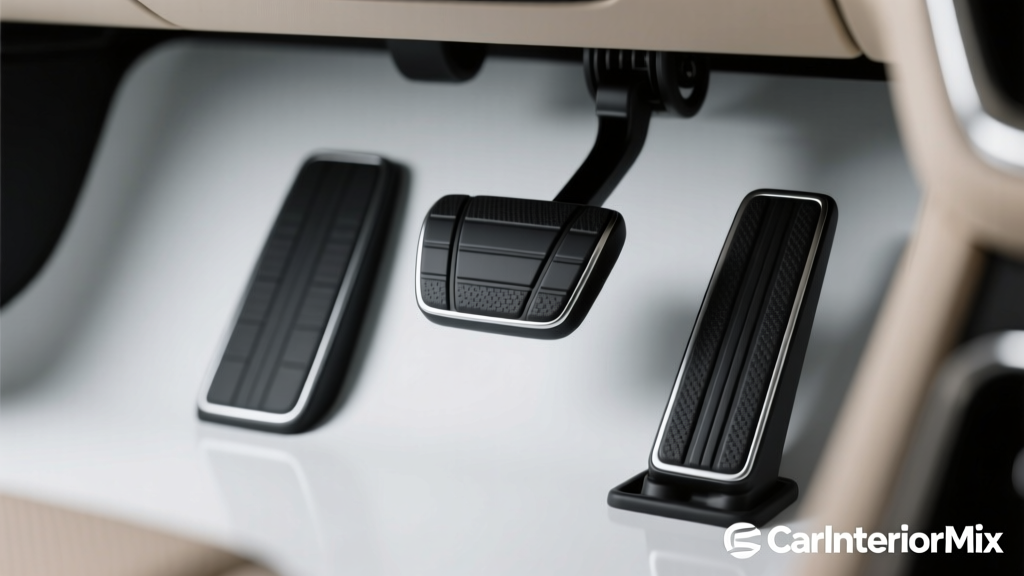
Pedal Cover Upgrade Troubleshooting Guide - CarInteriorMix
Upgrading your gas, brake, and clutch pedal covers is one of the simplest ways to refresh a car?s interior. A good set can add grip, match your cabin styling, and make daily driving feel more planted?especially in wet weather or with smooth-soled shoes. But pedal covers also sit in a ?no-fail? zone: if they slip, bind, or change pedal feel, that?s more than a cosmetic annoyance.
This guide is built for real-world installs?everything from slip-on rubber covers on a commuter to drilled aluminum sport pedals on a weekend build. If your pedal cover upgrade isn?t fitting correctly, squeaks, shifts during driving, or triggers a warning light, you?ll find the likely cause and a step-by-step fix here. You?ll also learn what to avoid so you don?t create a safety issue while chasing a cleaner look.
Whether you?re installing OEM-style rubber replacements or aftermarket aluminum pedal covers, the goal is the same: secure fit, predictable pedal travel, and confident foot placement. Let?s troubleshoot it the right way.
Before You Start: Safety and Quick Checks
Safety first (non-negotiable)
- Do not drive if a cover can move, rotate, or interfere with pedal travel.
- Test pedal operation with the engine off first, then with the engine on while parked.
- Check for full throttle (gas pedal) and full brake travel without obstruction.
- If your car has a floor mat retention system, make sure mats are properly clipped and not creeping forward.
Tools and supplies that solve most problems
- Isopropyl alcohol (70?90%) and clean microfiber towels
- Plastic trim tool or flat plastic scraper (for removing stubborn rubber)
- Small socket set / screwdriver set (for bolt-on pedal kits)
- Torque screwdriver or small torque wrench (helpful for bolt-on sets)
- Threadlocker (medium strength) for bolts (if the kit allows)
- Heat gun or hair dryer (for softening tight rubber covers)
- Measuring tape or calipers (to confirm pedal dimensions)
Know What You?re Installing: Pedal Cover Types and What Can Go Wrong
Slip-on rubber covers (OEM-style replacements)
These stretch over the existing pedal pad. They?re common for brake and clutch pedals and sometimes for older accelerator designs. Typical issues are poor fitment, rolling edges, or slipping if the pedal surface is worn or contaminated.
Clamp-on or strap-on universal covers
These are usually metal or plastic covers that clamp over the factory pedal. They can work, but many problems stem from mismatched sizing or clamp pressure that loosens over time.
Bolt-on aluminum sport pedals (drill-through style)
These often require drilling the factory pedal pad and fastening with bolts and locking nuts. They can be very secure when installed correctly, but alignment and hardware choice matter. A slightly off-center install can change ergonomics and cause edge contact with shoes.
Pedal ?replacement? assemblies (complete pedal swap)
More common for performance builds and some OEM upgrades. These can introduce electronic issues on drive-by-wire cars (accelerator pedal position sensor) if incompatible or improperly calibrated.
Top Pedal Cover Problems (and How to Fix Them)
1) The pedal cover keeps slipping or shifting
Most common causes: dirty pedal surface, wrong size cover, stretched rubber, weak clamps, or the cover is installed over a worn factory pad.
Step-by-step fix:
- Remove the cover and inspect the pedal face. Look for glossy wear spots, old adhesive, or rubber ?crumbing.?
- Clean thoroughly with isopropyl alcohol. Let it dry completely.
- Confirm sizing:
- Measure your pedal?s width and height.
- Compare to the manufacturer?s fitment chart, not just a ?universal? claim.
- Inspect the cover?s inner surface:
- Rubber covers should have intact ribs or retention lips.
- Clamp-on covers should have even clamp points and no bent tabs.
- Reinstall correctly:
- For rubber: start from the top edge, pull down and around, and ensure the retaining lip wraps fully behind the pedal.
- For clamps: center the cover, tighten evenly, and re-check after a few presses.
- Test for movement by pressing and releasing the pedal 20?30 times. Try different shoe types if possible.
Practical tip: If a rubber cover is extremely tight, warm it slightly with a hair dryer to make it more pliable. Don?t overheat it?warm and flexible is the goal, not soft and deformed.
2) The cover interferes with pedal travel (binding, sticking, or not returning smoothly)
Most common causes: cover is too large, installed crooked, edges catching on the carpet or neighboring pedal, floor mat interference, or hardware protruding on bolt-on sets.
Step-by-step fix:
- Remove floor mats temporarily and retest pedal movement. Many ?sticky pedal? complaints are mat-related.
- Check alignment:
- Look straight at the pedal face?cover should be centered and square.
- Check the side profile?no part should protrude toward the carpet.
- Inspect for contact points:
- Scuff marks on the carpet or center console panel indicate rubbing.
- Shiny edges on the pedal cover indicate shoe contact or interference.
- For bolt-on covers, verify that:
- Bolts aren?t too long and not hitting the pedal arm or floor.
- Washers and lock nuts are seated properly.
- Reposition or replace:
- If it?s a universal cover that can?t be centered without interference, swap to a vehicle-specific kit.
- If the mat is creeping, use OEM retention clips or a mat with proper anchors.
Real-world example: A common issue on compact cars is an oversized accelerator cover that slightly overhangs toward the brake. In sneakers it feels fine; in boots the edge can catch when transitioning from gas to brake. If you notice any ?edge snag,? don?t try to live with it?resize or replace.
3) The pedal feels different (too high, too low, or awkward spacing)
Most common causes: cover thickness changes pedal height, poor positioning on bolt-on sets, mismatched pedal set (brake/clutch vs accelerator), or adding a cover over an already thick factory pad.
Fix approach:
- Measure the thickness of the cover and compare to OEM pad thickness. Even a few millimeters can change heel-toe ergonomics.
- Adjust position on clamp/bolt-on kits if slots allow. The goal is centered foot contact where your shoe naturally lands.
- Match the set: Some kits are designed as a complete system for consistent height and spacing. Mixing brands can create odd offsets.
Tip for manual cars: If you upgraded the clutch and brake covers but not the accelerator, check that the clutch-to-brake-to-gas transition feels predictable. A ?taller? brake pedal cover can change rev-matching and daily comfort.
4) Squeaking, clicking, or rattling after installation
Most common causes: loose hardware, metal-on-metal contact, clamps shifting, or a cover flexing against the factory pad.
Step-by-step fix:
- Confirm tightness on all screws/bolts. If the kit includes lock nuts, make sure they?re fully engaged.
- Tighten evenly (cross-pattern if multiple fasteners) to avoid bending the cover.
- Use medium threadlocker if allowed by the manufacturer and if bolts thread into nuts (not plastic).
- Check for contact between the cover and pedal arm or surrounding trim during full travel.
Practical tip: Avoid lubricants on the pedal face or between the cover and pad. Anything that reduces friction can increase slipping risk.
5) Warning lights or driveability issues after an accelerator pedal upgrade
Most common causes: incompatible accelerator pedal assembly, damaged connector, bent pins, or calibration issues on drive-by-wire systems.
What to do:
- If you replaced the entire accelerator pedal assembly (not just a cover) and now have a check engine light, reduced power, or throttle issues, stop driving and scan codes.
- Verify the replacement part number is correct for your exact trim and year.
- Inspect the electrical connector for bent pins or a loose latch.
- Some vehicles require a throttle/accelerator pedal relearn procedure?follow the OEM service info or a trusted repair manual.
Bottom line: Accelerator pedal electronics aren?t a ?universal fit? category. If your goal is interior styling and grip, a pedal cover is safer than swapping the assembly unless you?re using OEM parts and procedures.
Step-by-Step: Installing Pedal Covers the Right Way (So You Don?t Have to Troubleshoot Later)
Rubber slip-on pedal cover install (brake/clutch)
- Remove the old cover by pulling from the top edge and working around the perimeter.
- Clean the pedal with alcohol and let it dry.
- Warm the new cover slightly if it?s stiff (hair dryer, low heat).
- Hook the top lip first, then pull down and around both sides.
- Confirm full retention: run your finger around the back edge?no part should be unseated.
- Function test: press the pedal repeatedly and ensure it doesn?t roll or creep.
Bolt-on sport pedal cover install (general best practice)
- Dry-fit and mark hole locations with the cover perfectly centered.
- Remove the pedal pad if your vehicle allows (often easier on brake/clutch pads).
- Drill carefully using the recommended bit size; deburr holes to avoid tearing rubber.
- Install hardware with washers as directed and tighten evenly.
- Verify no protrusion can snag carpet or nearby trim at full travel.
- Re-test after 24?48 hours (hardware can settle slightly).
Product Recommendations: What Tends to Work Best
Best for daily drivers: OEM-style rubber pedal pads
If your priority is safety, long-term grip, and factory feel, OEM or OEM-equivalent rubber pads are hard to beat. They?re designed for your pedal shape and usually provide the most reliable retention.
- Pros: excellent fitment, consistent grip wet/dry, no sharp edges, typically inexpensive
- Cons: limited styling options
Best for style + traction: vehicle-specific aluminum/rubber insert kits
Choose a kit built specifically for your make/model. Look for stainless hardware, anti-slip rubber inserts, and a reputable fitment list.
- Pros: strong aesthetics, good grip, better fit than ?universal?
- Cons: install time is longer; mistakes in drilling/alignment are common
Approach ?universal? clamp-on covers cautiously
Some are fine for show cars or light use, but they?re the most likely to slip or interfere with pedal travel if sizing is off by even a little.
- Pros: quick install, widely available
- Cons: inconsistent fit, hardware loosening, higher chance of interference
Quick buying checklist:
- Vehicle-specific fitment chart (year/make/model/trim)
- Non-slip surface with real traction features (ribs, rubber inserts, knurling)
- Fasteners that resist loosening (lock nuts, locking washers)
- Clear instructions and reputable reviews mentioning long-term stability
Common Mistakes to Avoid
- Installing over a dirty or shiny pedal surface: oils and polish reduce friction and retention.
- Ignoring floor mats: a thick mat or one that isn?t clipped in can create dangerous pedal interference.
- Assuming ?universal fit? means safe fit: pedal geometry varies more than most people expect.
- Over-tightening bolt-on kits: can warp the cover, crack inserts, or create sharp edges.
- Using adhesive as a shortcut: glue can fail with heat and moisture and makes inspection harder later.
- Skipping function tests: always test full travel and return before driving.
FAQ: Pedal Cover Upgrade Troubleshooting
How do I know if my pedal cover is unsafe?
If it can move by hand, rotates during repeated presses, interferes with full travel, or changes the pedal?s return behavior, treat it as unsafe. Remove it and reinstall correctly or replace it with a proper-fit option.
Can pedal covers cause unintended acceleration?
A poorly fitted accelerator cover can potentially catch on carpet/floor mats or fail to allow full return. That?s why clearance checks and mat retention are critical. If anything binds, remove the cover immediately.
Why does my new rubber pedal cover keep popping off at the corner?
Usually the retaining lip isn?t fully seated behind the pedal, or the cover size is slightly off. Warm the cover, reinstall starting from the top lip, and ensure the entire perimeter is hooked behind the pedal plate.
Are metal pedal covers slippery when wet?
They can be if they lack proper traction features. Look for rubber inserts, textured knurling, or raised grip patterns. Smooth metal faces are a bad idea for daily driving shoes in rain.
Do I need to remove the pedals to install a cover?
For slip-on rubber covers, no. For some drill-through sport pedal kits, removing the pedal pad (or working with extra space) can make alignment and drilling much cleaner. Full pedal removal is uncommon unless you?re replacing the pedal assembly.
How often should I re-check pedal cover tightness?
Check after the first week, then at oil-change intervals. If you drive in wet/snowy conditions often, inspect more frequently?debris and moisture can speed up loosening or wear.
Conclusion: Get the Feel You Want Without Compromising Safety
A pedal cover upgrade should make your car feel more secure and look more finished?not introduce slipping, binding, or weird spacing. If you?re troubleshooting, start with the basics: correct sizing, clean surfaces, proper seating, and full travel clearance (especially with your floor mats installed correctly). When in doubt, choose vehicle-specific or OEM-style options over universal clamp-on covers.
Next steps:
- Do a no-mats clearance test, then reinstall mats using proper anchors.
- Confirm your pedal cover is centered, fully seated, and doesn?t move under repeated presses.
- If you?re still not happy with stability, return it and upgrade to a vehicle-specific kit or OEM pads.
Want more practical interior upgrade help? Browse more guides, comparisons, and troubleshooting tips at carinteriormix.com.